

Why bother with paths and beds?
Forty years ago, most gardeners grew on level ground, with plants in rows and walking space between. Then, gradually, raised beds made appearances in a few gardens. Nowadays beds are almost the default method, as their benefits are acknowledged.
Yet there has been less attention paid to the spaces between and around beds. I see time and money being spent on paths, and bed sides too, but without always the necessary understandings on how to maintain paths, and how the soil in paths can work for us. This lesson considers many of the issues.
Path characteristics:
- They are permanent, in the same place every year.
- Mulched soil in paths maintains structure, fertility and moisture – available to plant roots from the bed edges.
- They are not just ‘ground to walk on’, but part of your growing space.
How paths relate to beds
It is often assumed that beds are raised beds with sides, usually made of wood. If all of your beds are like this, and you wish to continue with sided beds, then you have different options for paths. This is because, for example, grass struggles to grow through a wooden plank! However, couch grass can sneak underneath, as we shall see.
Any grass path needs maintenance (mowing/cutting), and the roots will be feeding into soil at the bed edges, if not growing up into the beds. In preference to this, my advice is to achieve lower levels of maintenance. Most of this lesson is about beds with only a slight raise and no sides, which I find the cheapest and quickest way to establish and maintain a growing area.
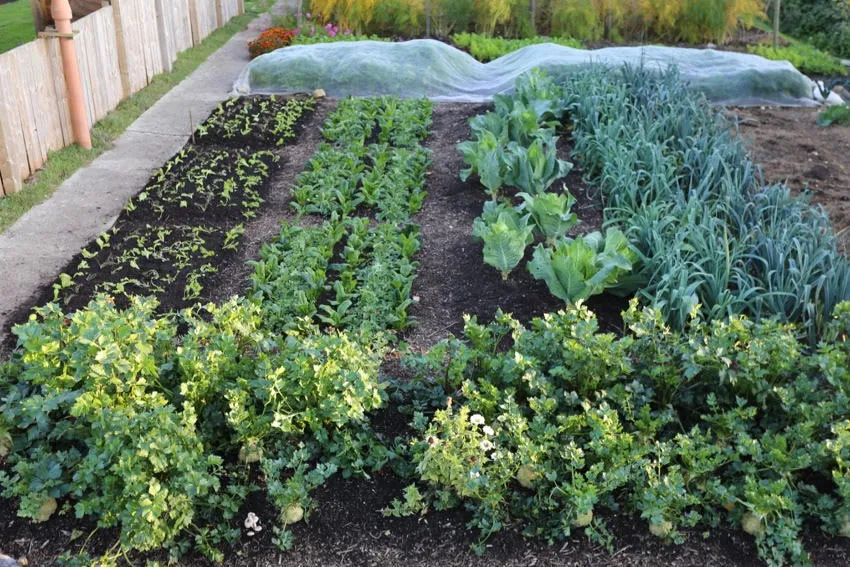
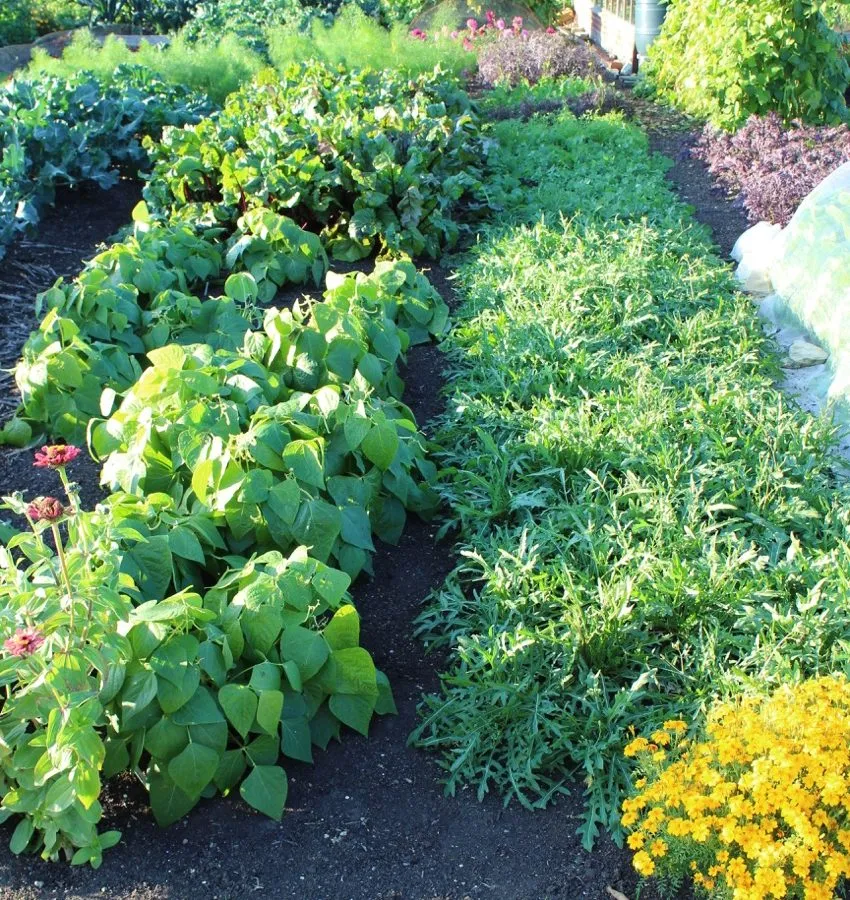
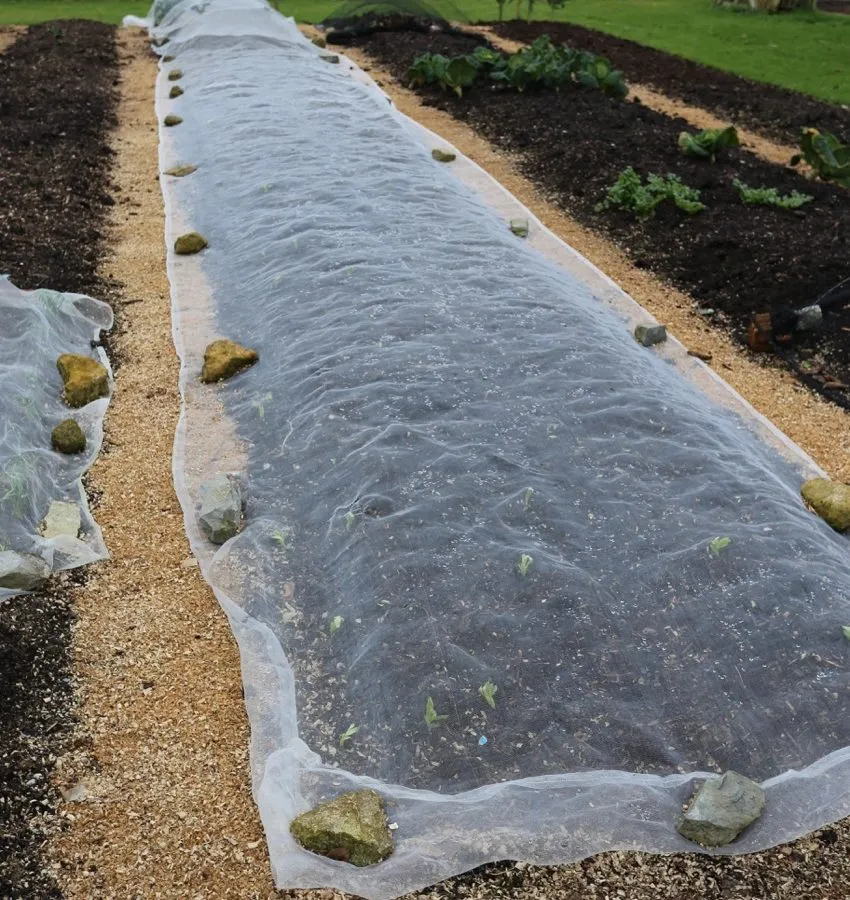
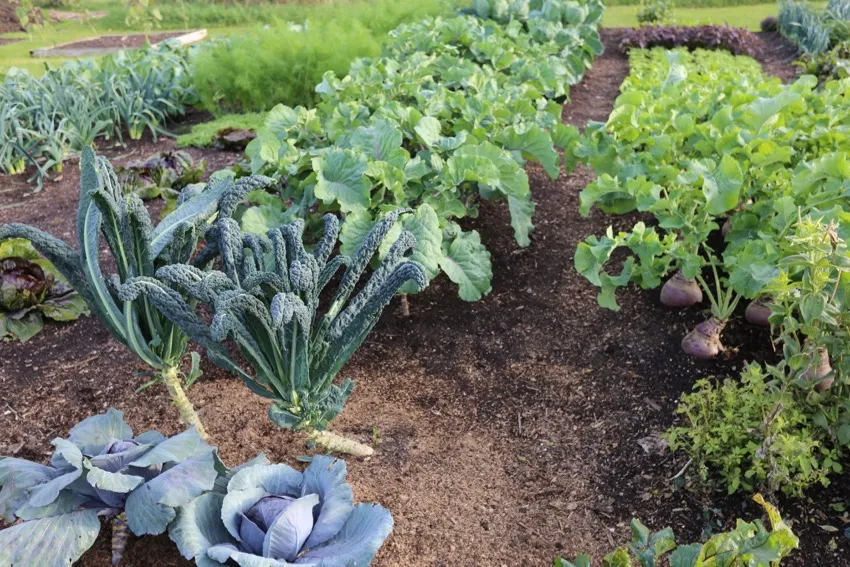
Much of the reason for having paths is the definition of space, and to make planning and access easier, and spacing of plants more intensive. Close planting on beds, to concentrate cropping, makes it possible to protect blocks of plants from pests, using just one cover. Plus it’s a more economical use of water and compost, with many plants benefitting, rather than just a few.
Weed free paths
The skill of maintaining weed free paths is worth acquiring. This means that all goodness and moisture in the path soil is available for plants, once they are large enough for their roots to travel that far.
Having paths clean of weeds is helped by feeding path soil with surface mulches of organic material, to feed soil life and maintains structure. This can be compost, or woody materials, preferably in small pieces and part decomposed at the time of application. No weeds in paths means no weed roots spreading in to beds, and no seeds blowing on.
There are other options for paths, which I mention but do not recommend, because of cost, maintenance difficulties, and the soil not being fed:
- Gravel – this needs a membrane underneath, unless you fancy a lot of difficult weeding.
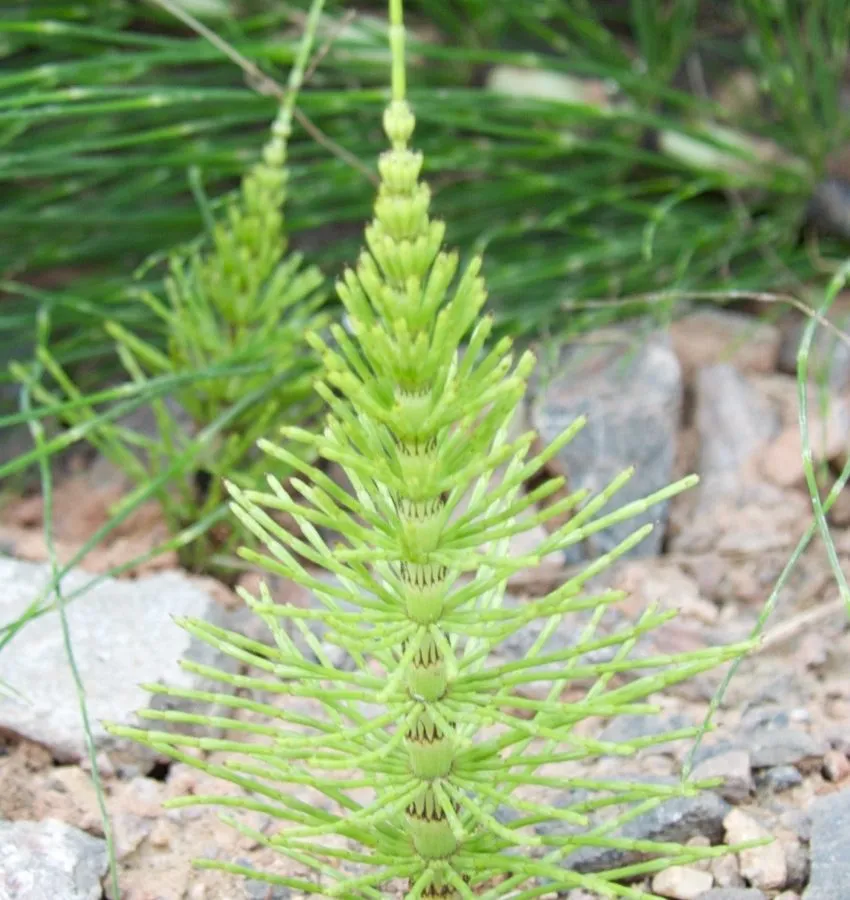
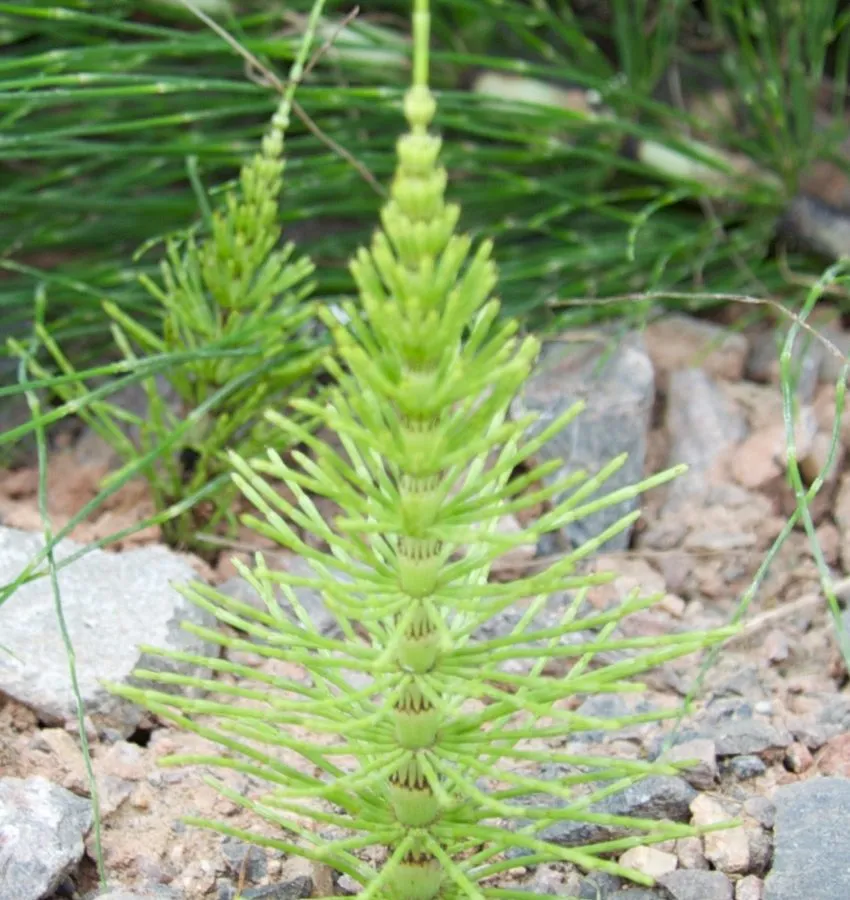
- Stone and cement – the marestail shows how perennial weeds can, and will, grow through surfaces that look impenetrable to us.
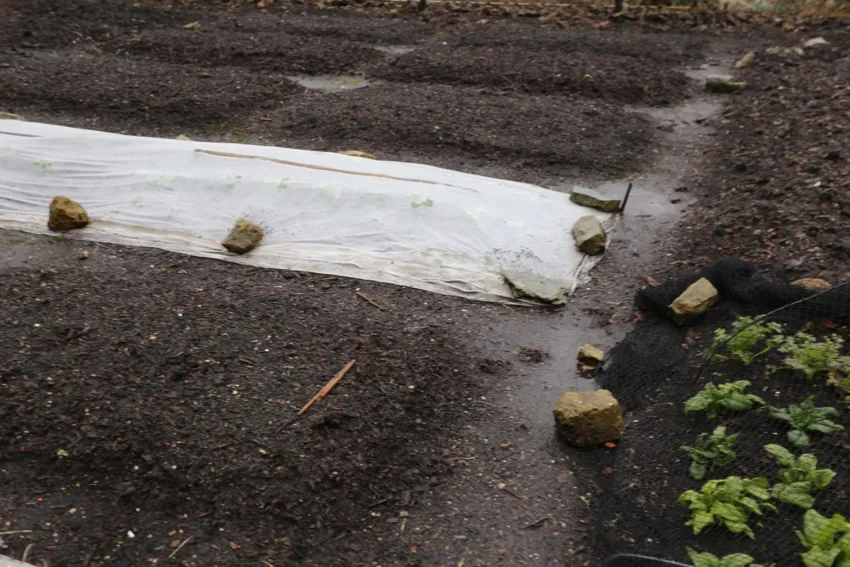
- Polypropylene membrane – this looks like an easy and time-saving option; however, it harbours slugs, is expensive, does not feed soil, and risks disappearing into the soil if enough mulch lands on top, and weeds then grow in that.
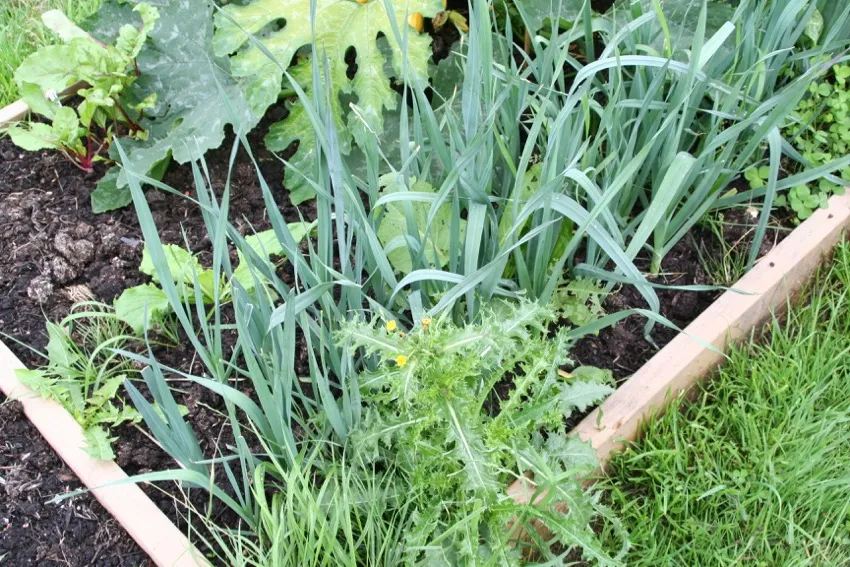
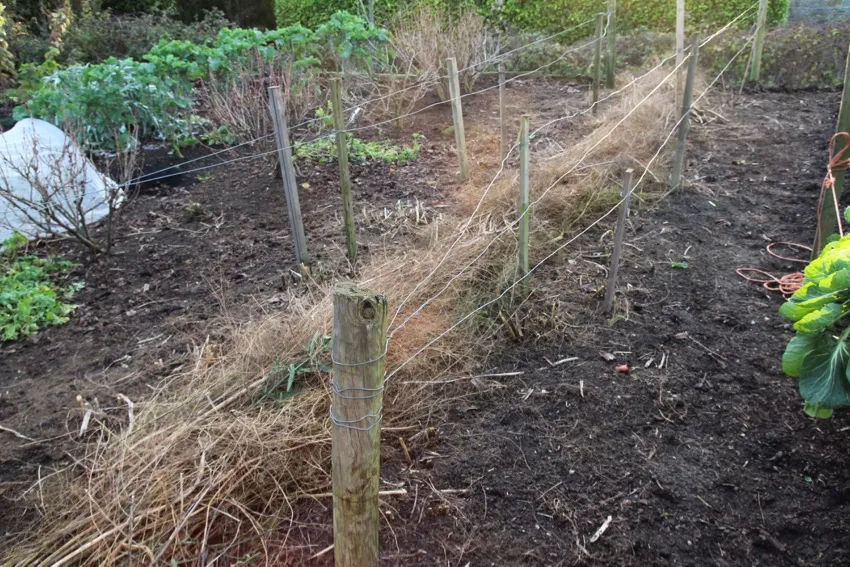
How not to have paths
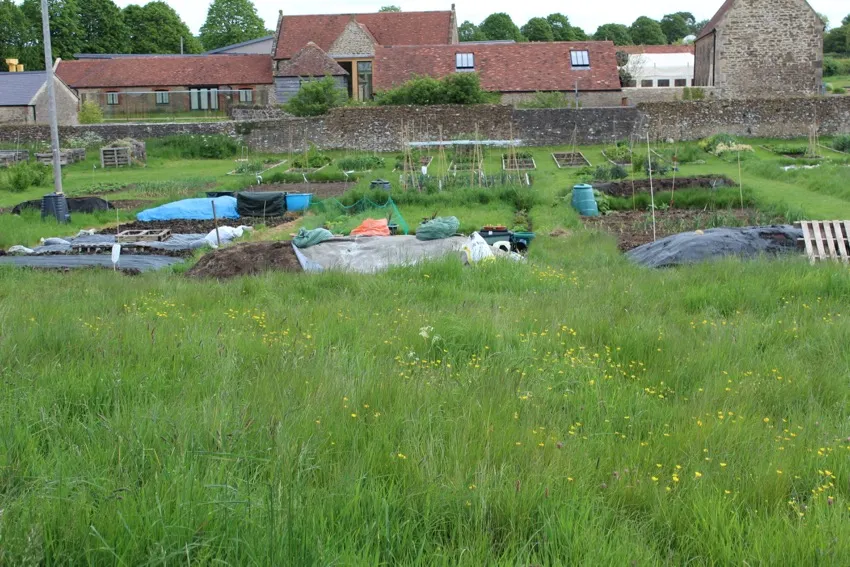
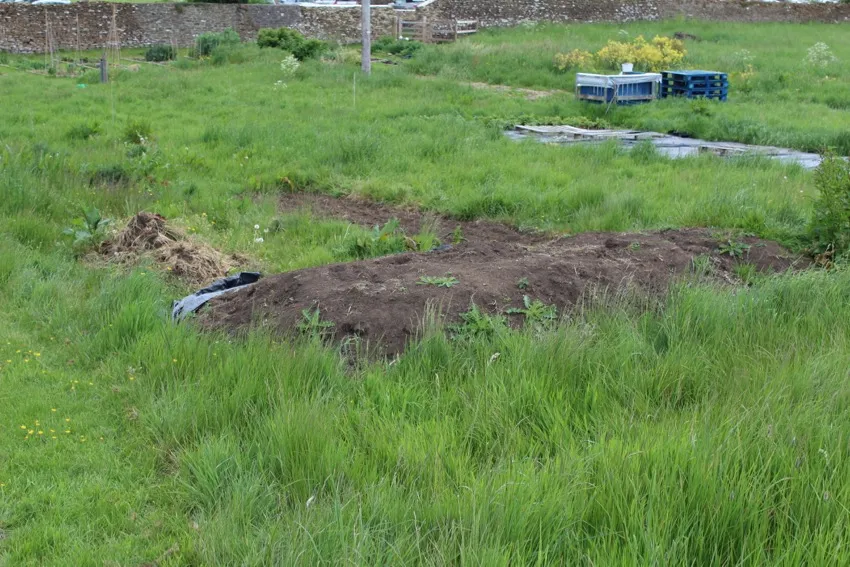
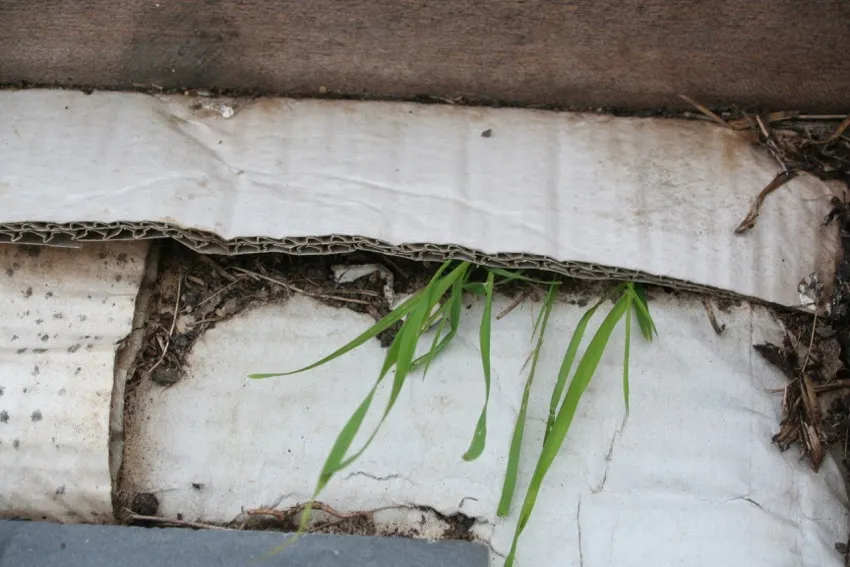
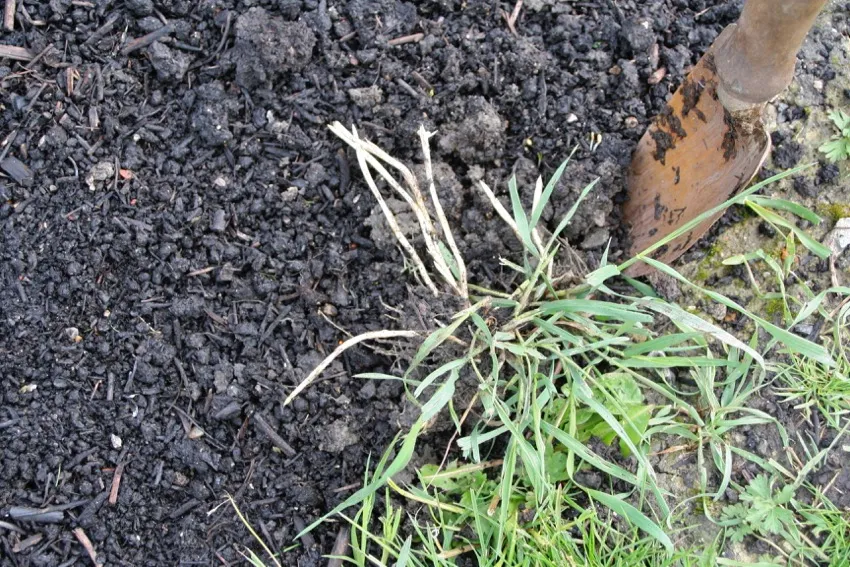
To understand better what paths can offer when well maintained, it helps to look at the difficulties resulting from poor choices of path layout and surface. Nature never exists in a vacuum and, if you are not organised about your paths, she will take over.
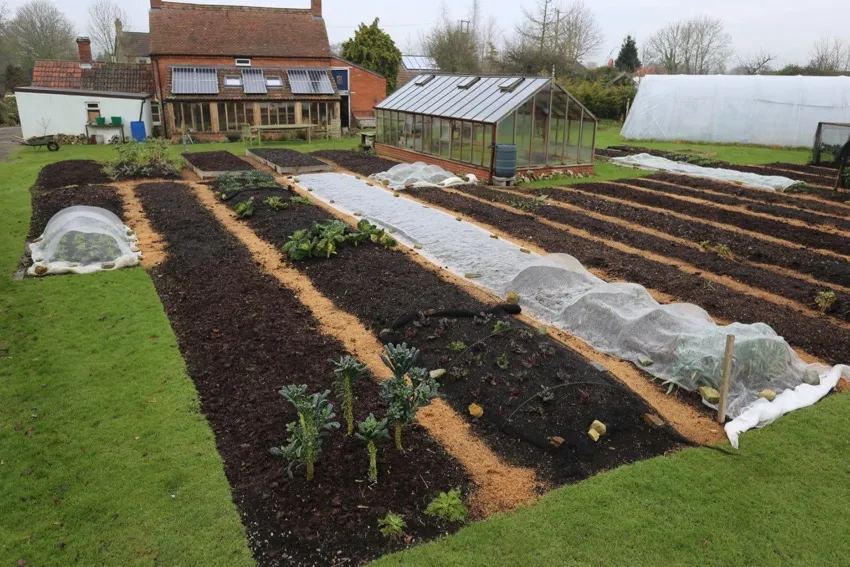
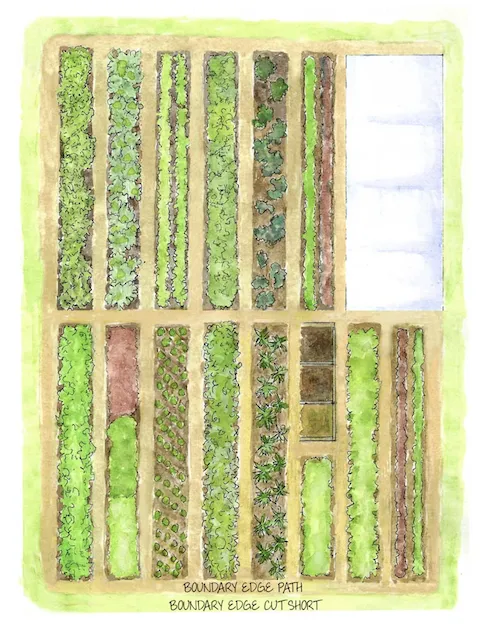
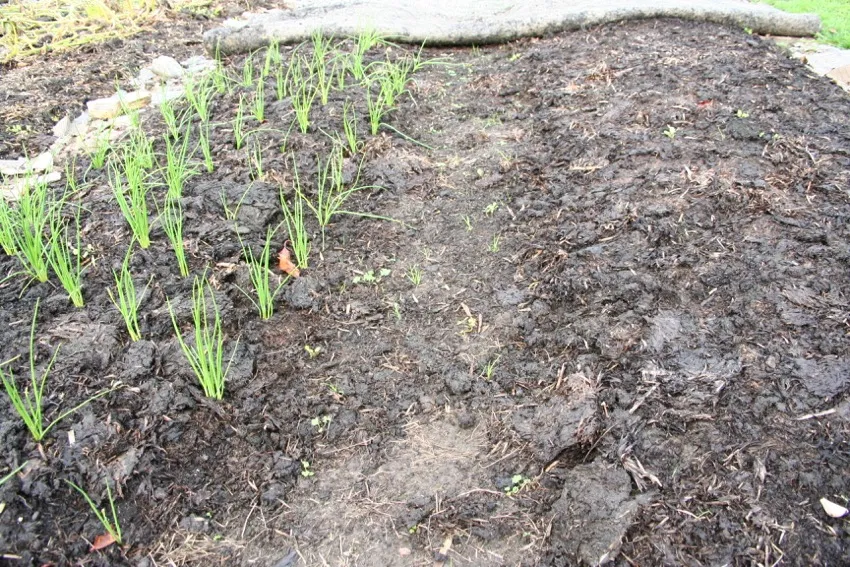
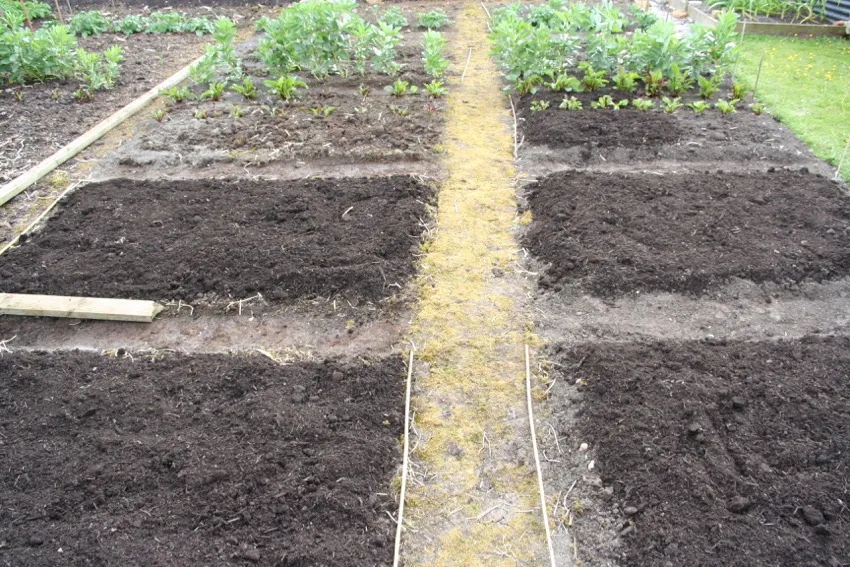
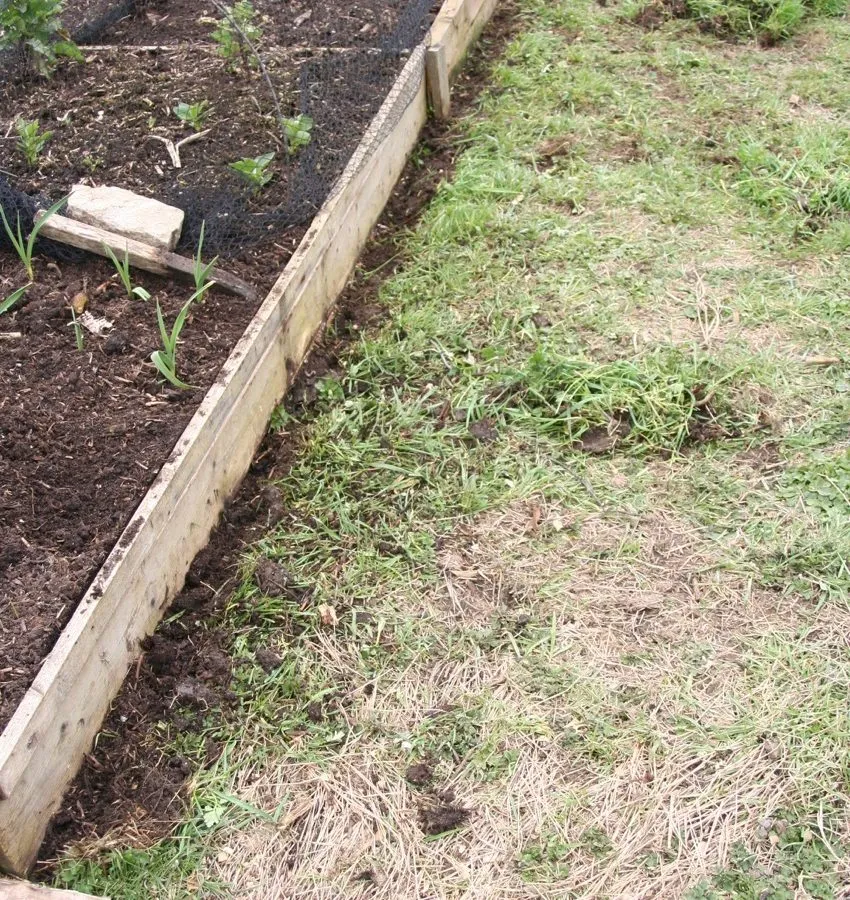
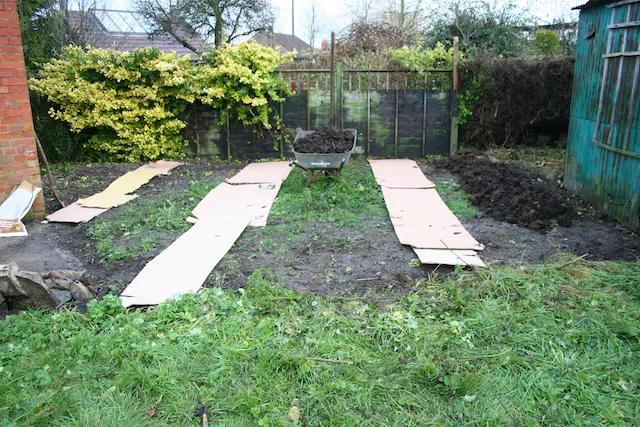
The photos below come from a nearby allotment site, and what they show is not uncommon – especially where there isn’t an active committee to keep the site mown, and perhaps also to give advice.
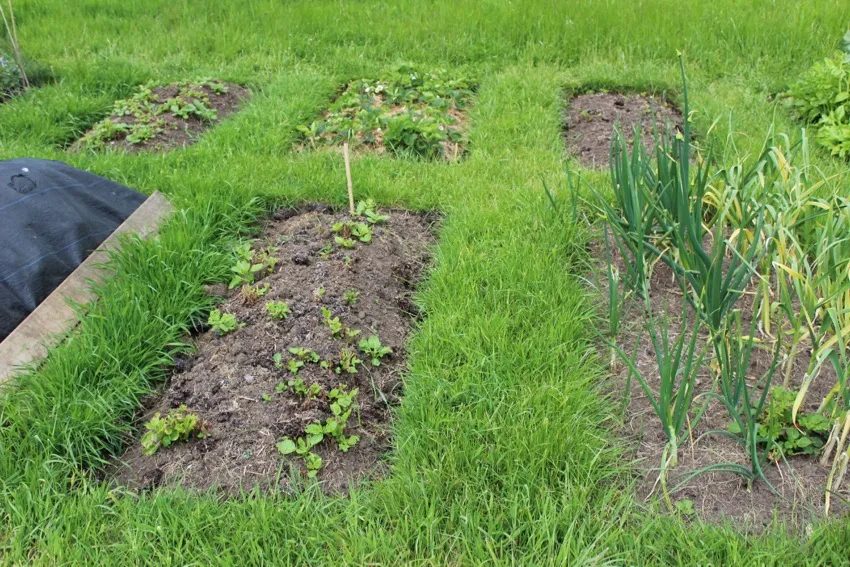
The second photo above shows a plot layout which must have been devised by gardeners of little experience, who have gone to some trouble over their beds. They are losing most of the moisture and goodness along the edges, and the ground is more path than bed. There will need to be frequent mowing and edging – wide and weedy paths create a lot of work, in proportion to the area cropped.
- I advise against paths of grass, except when you have only one or two beds surrounded by lawn.
- It’s feasible to have wider beds and narrower paths – see my examples in the next section.
- Keep green edges to a minimum because they mean extra work. A square growing area is way more efficient than a long thin one, which has a high proportion of edge to middle.
- For Homeacres’ main bed area, we spend as much time keeping the grass edges trimmed as in doing all necessary weeding.
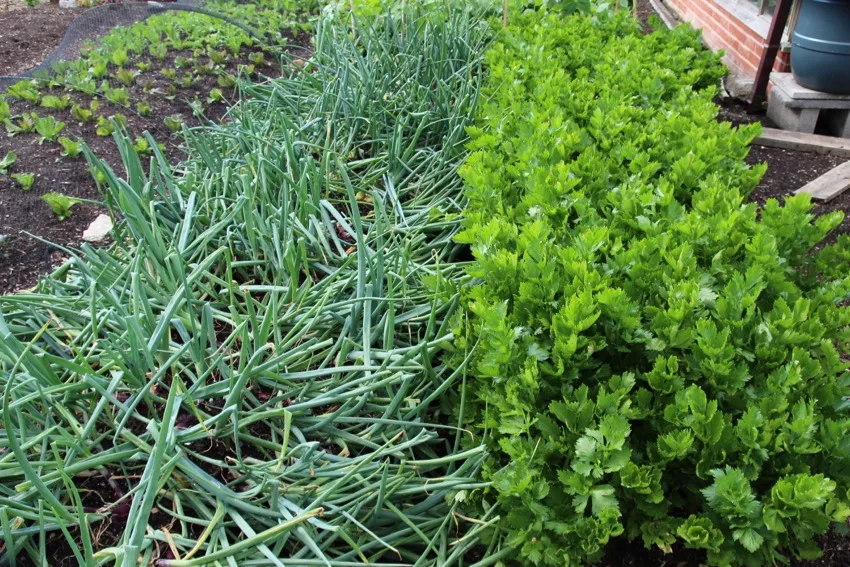
Path width
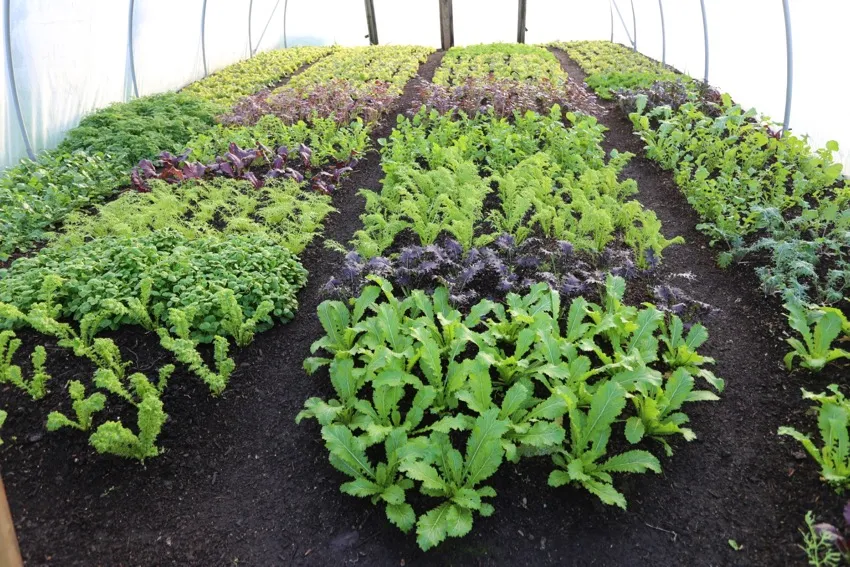
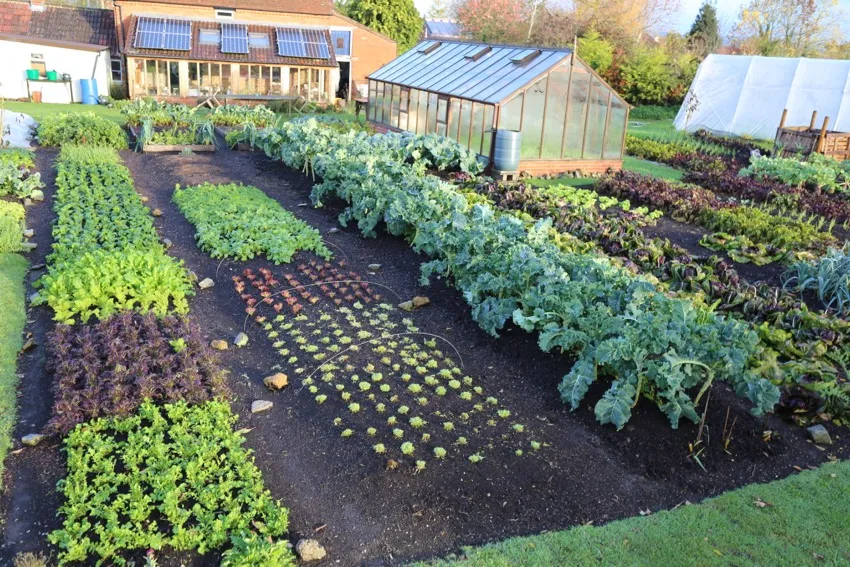
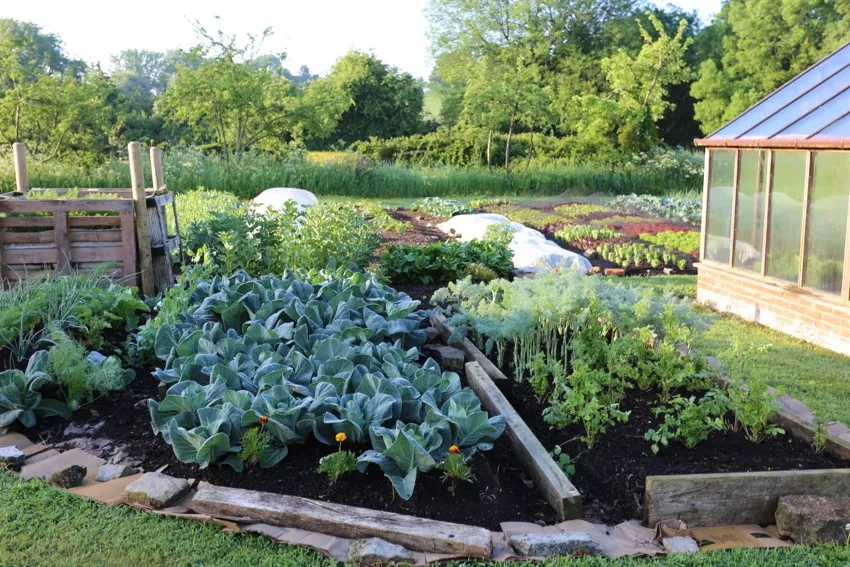
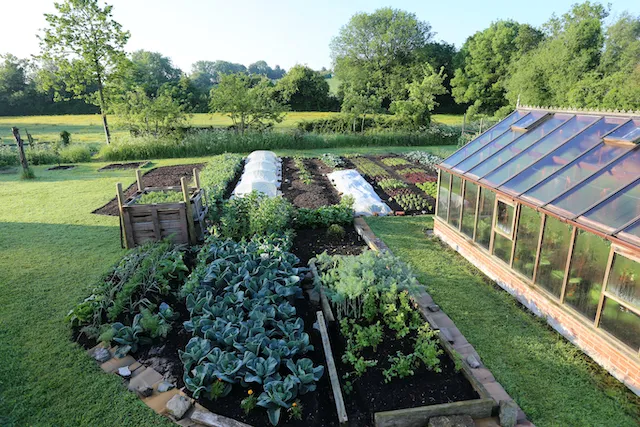
Paths at Homeacres are as narrow as feasible, to minimise waste of space and to reduce maintenance overall. The polytunnel and greenhouse are an extreme example of this – especially for winter leaf crops – because I want to maximise plantings in the precious covered area.
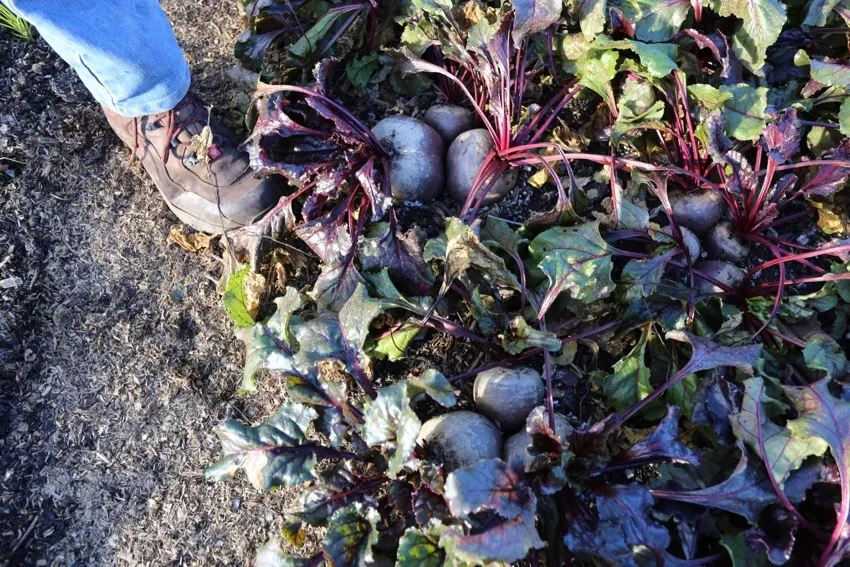
In the polytunnel I have three paths and slightly wider beds, rather than four paths and narrower beds. When picking salad from the 1.3 m (51 in) central beds, we place a foot on the bed to reach plants in the middle of each one.
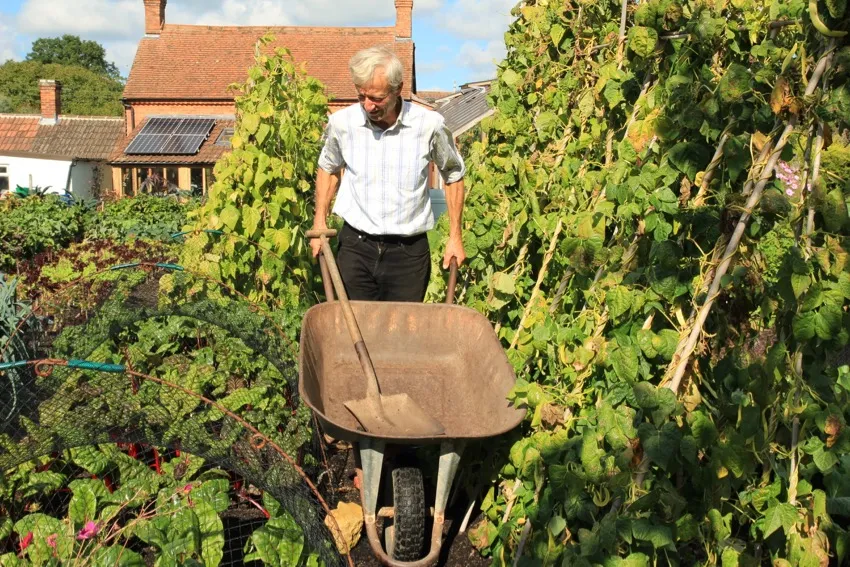
Even if your wheelbarrow is wide, it can run along a narrow path when there are no wooden sides. And it’s fine to rest the wheelbarrow legs on the beds either side, since their structure is firm.
At Homeacres a few of my paths are wider, to allow easier access on open days, and for groups when I am teaching. Apart from that consideration, my preferred path width is 35 cm (14 in).
How do you measure path width?
With non-sided beds it’s harder to see a boundary between path and bed, and in any case it’s a diffuse edge at best. The definition between bed and path is not a rigid one, because of how paths are part of the growing space.
Therefore the path widths I give are distances between approximate bed edges. Path widths are not the distance between the outermost rows of plants along each bed, because they run just inside the invisible bed edge.
For example, and in terms of running lengthwise along a bed:
- With salads, I plant the outside row 7 cm (3 in) inside each bed, with plants spaced at 22 cm (9 in).
- For multi-sown beetroots, the outside row of plants is 10 cm (4 in) from the notional edge, with plants spaced at 30–35 cm (12–14 in).
So the distance between the path edge and first row of plants is around a third of the distance between each plant in the beds. A little more or less is fine.
Don’t worry if your edges move a little, I find the main thing is to keep them straight – I do it by eye, or you could use a string.
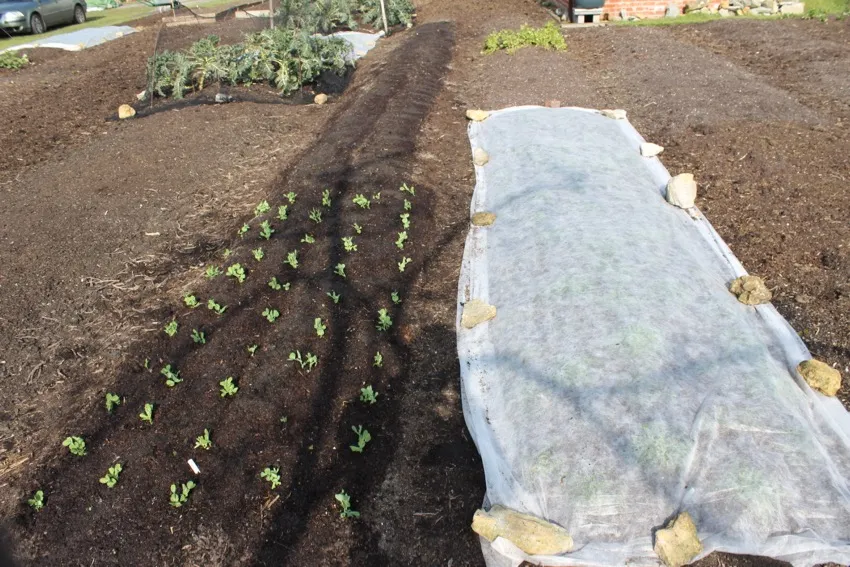
Path mulches
Think of mulches as feed for the soil, as well as being there to suppress weed growth. When soil is undisturbed and its inhabitants are well fed, fewer weeds grow, so the two go together.
This is one reason I do not recommend path mulches of membrane or polythene, which add nothing to soil fertility unless you lift them annually to spread an organic mulch underneath. The other reason is soil pollution.
There is a tendency for mulches of any kind of plastic to disappear below surface level. It seems impossible at first sight for this to happen, but I frequently hear stories of people taking on new allotments in the UK and then discovering synthetic carpet, plastic and membranes buried up to 15 cm (6 in) deep, and totally out of sight.
Once soil – or compost and weeds – lands on these plastic mulches, nature quickly colonises the surface. Once underground they become a layer that is impermeable, both to the roots of our plants and to larger organisms in the soil. A general hindrance to growth, which costs you time and money.
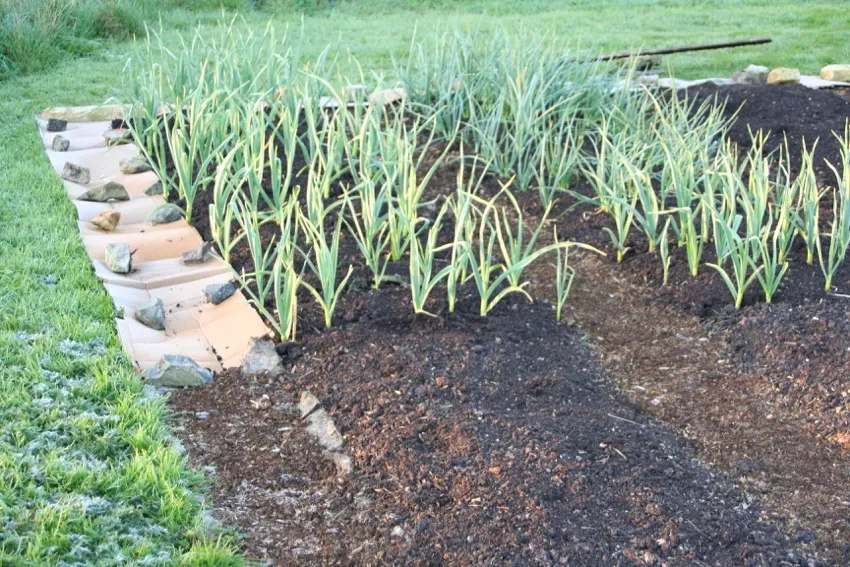
Cardboard is not pollutant-free, but I have not observed problems for worms or plants from using it just occasionally. In the case of path mulches, one to three layers of cardboard serve to kill most weeds, but this is necessary only in year one and, even then, only if there are many weeds to mulch.
Once weeds are gone, say at the end of year one, I usually spread a thin mulch of woody or half-decomposed compost as soil food, and to make weeding easier. It might seem like a waste to spread compost on paths, but it’s worth it.
I like to use woody mulches on paths, where practical. However when beds have no sides, don’t overdo the depth of woody mulch – this will prevent a lot of it from ending up on your beds.
Woody materials do not rob soil of nitrogen when on the surface; in fact they can then absorb nitrogen from the air, through azotobacter bacteria. A greater problem is that, on beds, they get in the way of seeding, or popping in small transplants. Plus they can harbour enough woodlice (pillbugs) that some plant stems and leaf edges get eaten, as well as the old wood.
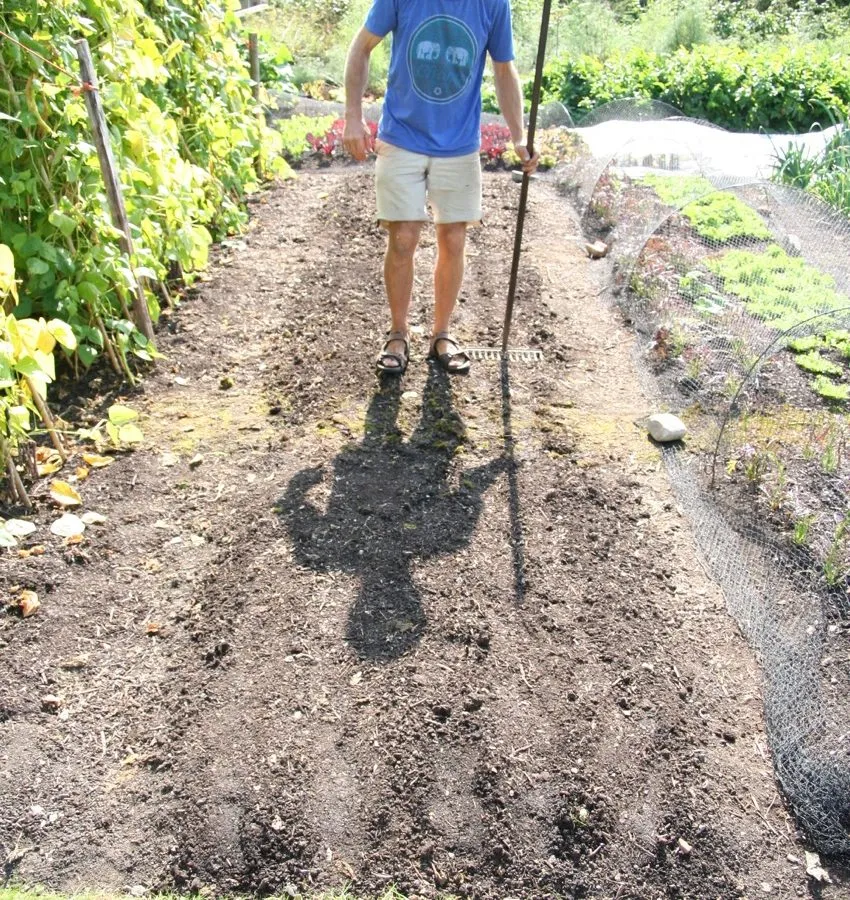
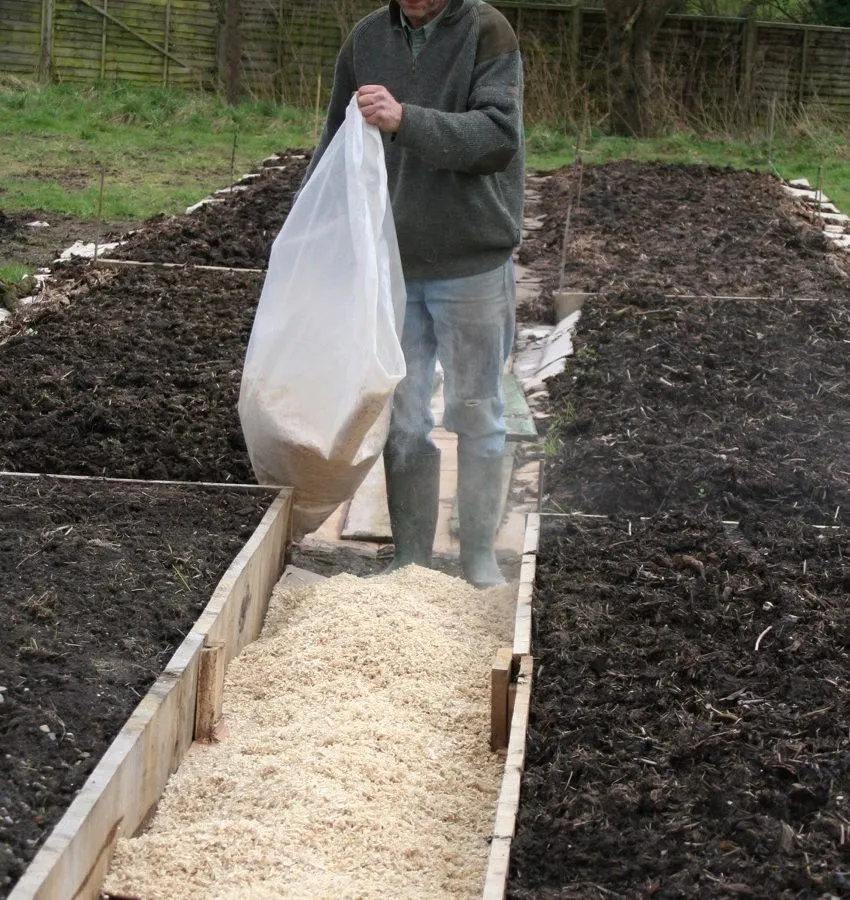
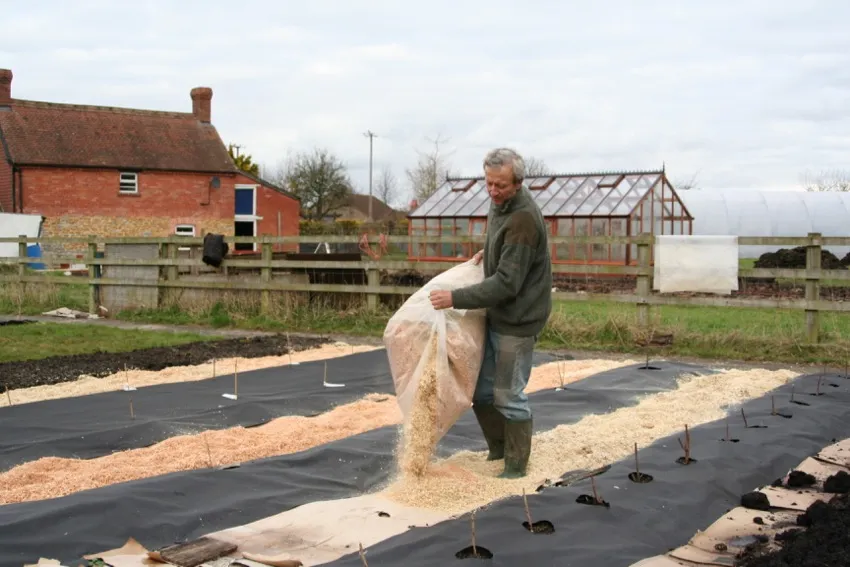
The shavings in the third photo below are from a heap of horse manure, in which they were the bedding. There is some horse poo in there, which helps the shavings to decompose. However, I would call that a mulch of shavings rather than manure, because the horses had been bedded with a large amount of wood.
The shavings in the photo above (‘A wider path of 50 cm (20 in)…’) are also from kiln dried wood, which takes longer to decompose than fresh wood chip. Plus they are oak, fresh from a joinery, and decomposition on paths is slow, taking up to two years.
The wood chip mulches in the photos below are from a six-month-old heap, where they had started to decompose in April, with the mulching done in November. I would prefer it if they were older and more decomposed, but was happy enough with what you see there.
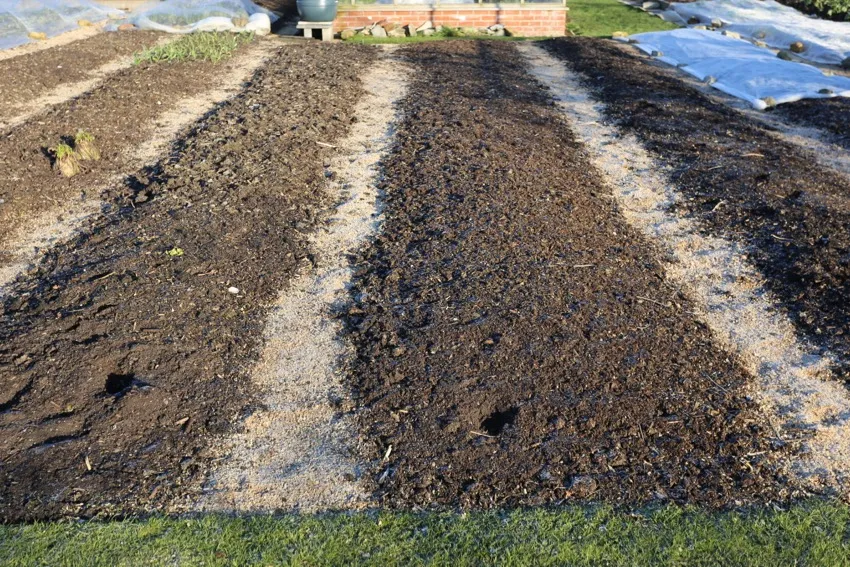
Generally I find that wood decomposes surprisingly fast when on the surface, partly because it is dampened frequently in our UK climate. The pieces of wood from the chips that you see here are not, in my experience, large enough to offer hiding places for slugs.
Wherever there are bits of wood on the surface, we see white mycelial threads, and sometimes mushrooms or toadstools. A significant benefit of woody mulches is the fungi, which colonise their breakdown process.
In a similar vein, with asparagus you can use the old stems as a path mulch. We scythe them off every autumn and lay the 2 m (7 ft) stems lengthways along the path between two rows, then walk on it several times. At first it’s a bulky mulch, but soon breaks up into pieces like straw and is then taken into the soil over 12–24 months.
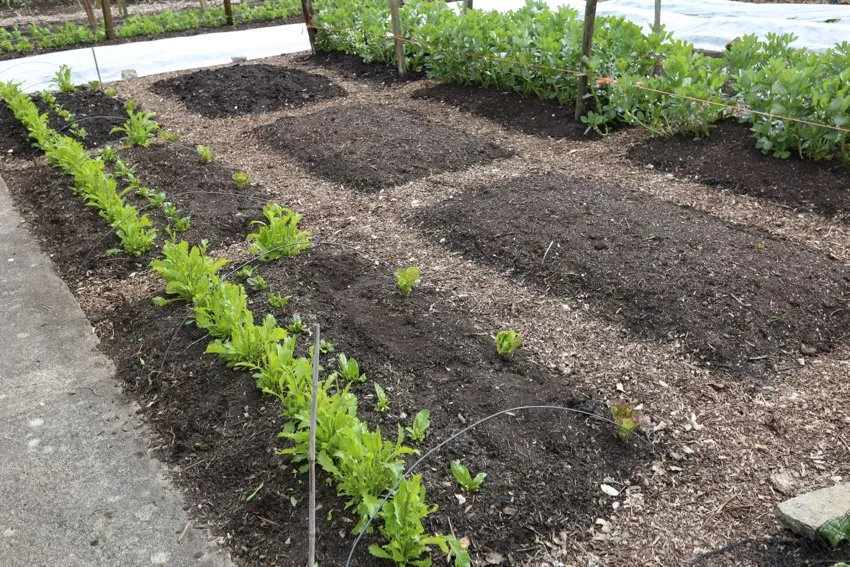
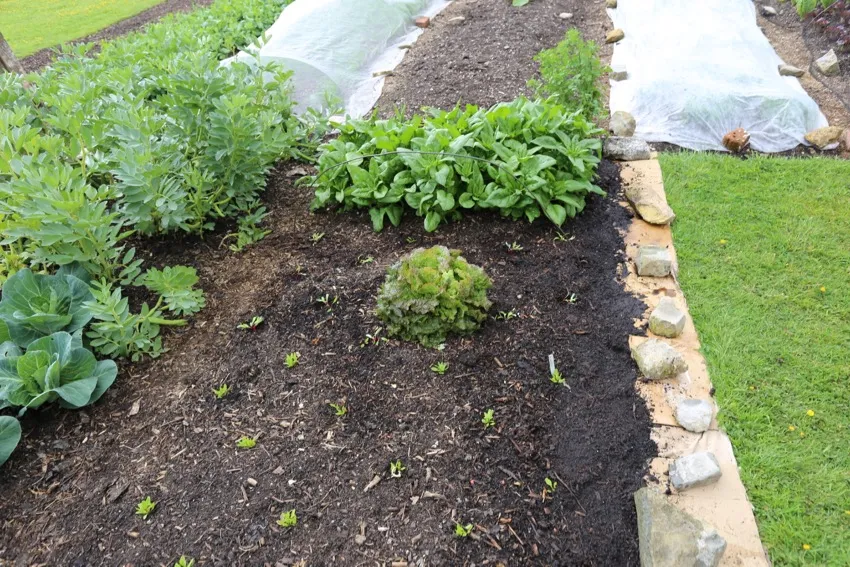
A sequence, from weeds to clean paths
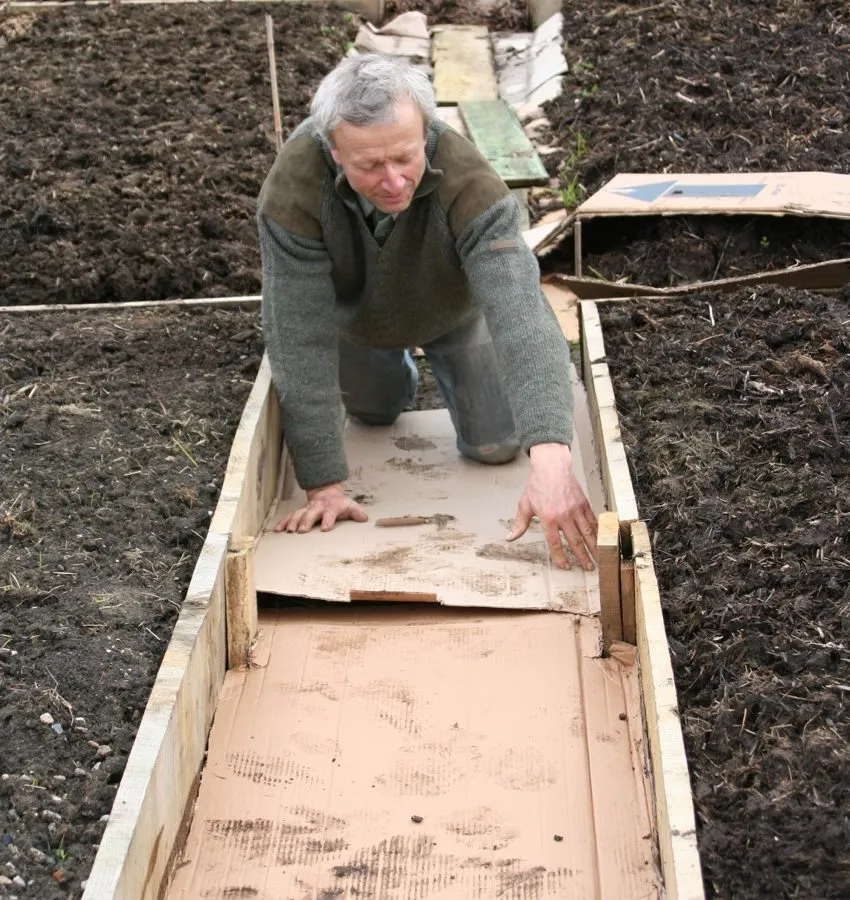
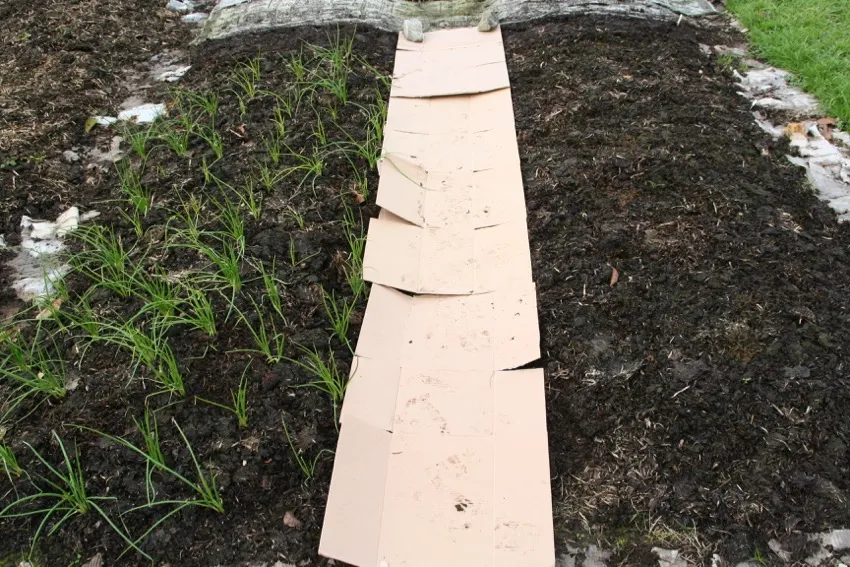
The photos below show the creation of a bed I made in my first Homeacres spring, on pasture which included a fair amount of couch grass (Elymus repens).
Instead of cardboard, I laid biodegradable polythene on one half of the bed area, to see if it made a difference. It turned out that this polythene is too soft for such a task, and the couch roots just speared through it. I advise you to save the expense of buying such a product, plus the ‘biodegrade’ time is more than a year, from what I saw.
In the end I kept pulling any new blades of couch grass, and it was all gone by early autumn. On the path nearest to what became a grass edge, there was couch grass spreading in, by rooting just under the path mulch. To save time pulling it, I laid new cardboard every three months or so, until midsummer of year two. Since then, we pull it when seen.
On one edge I experimented with a double layer of landscape fabric, on top of cardboard. This worked well and lasted longer than cardboard alone, but the fabric is a polythene product and I would not buy it again. Cardboard works.

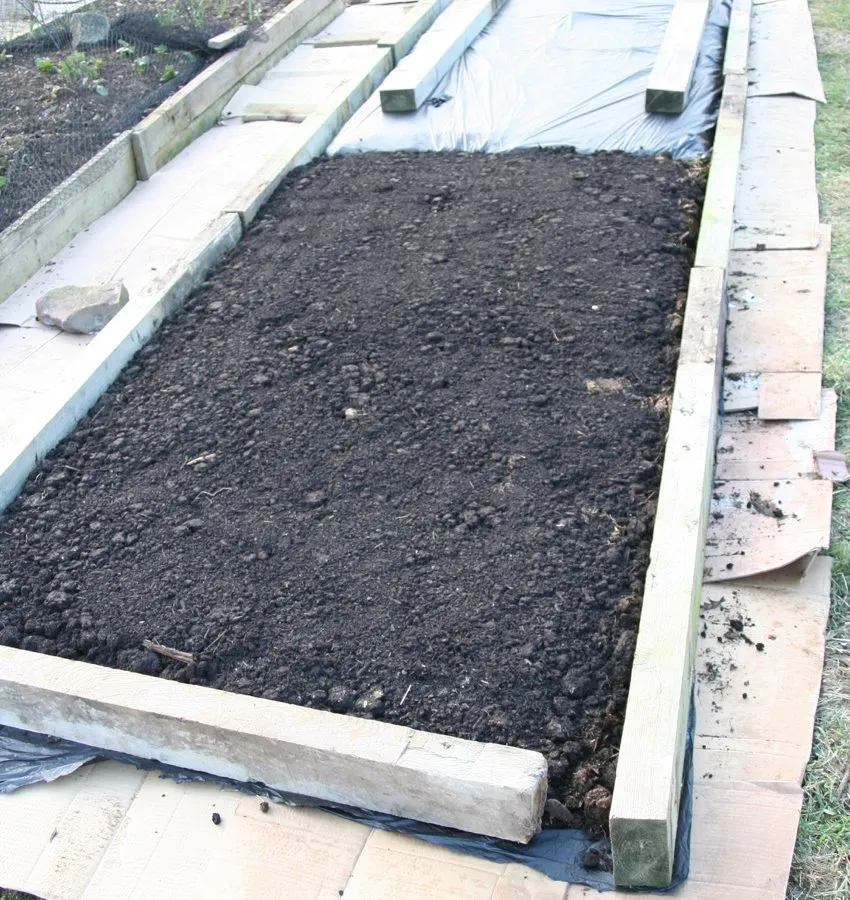
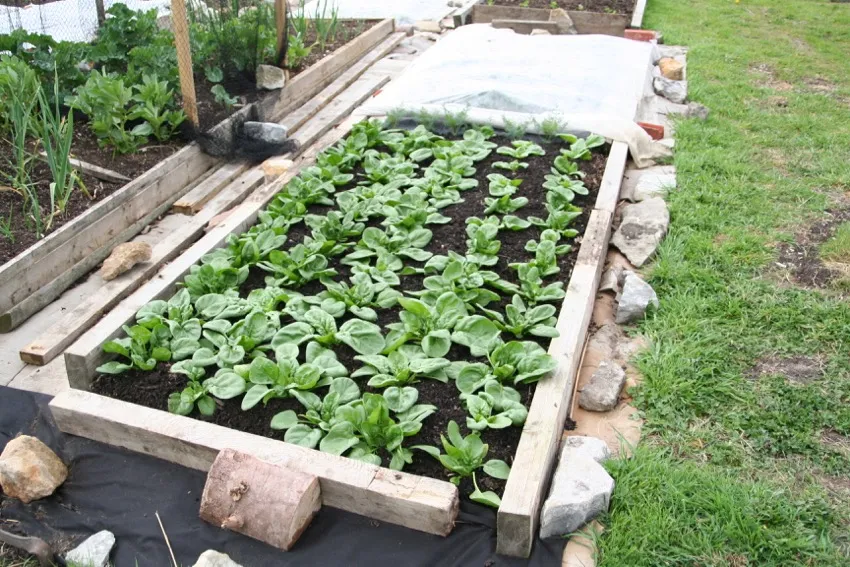
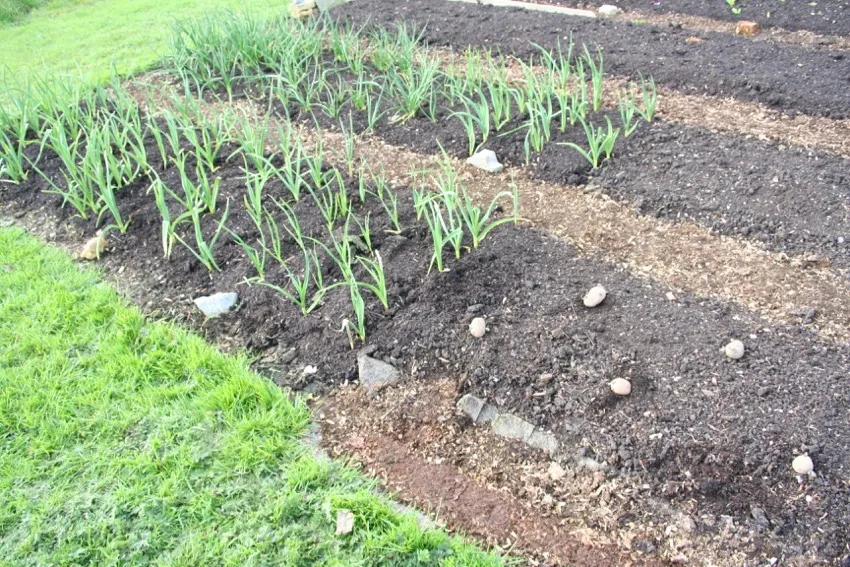
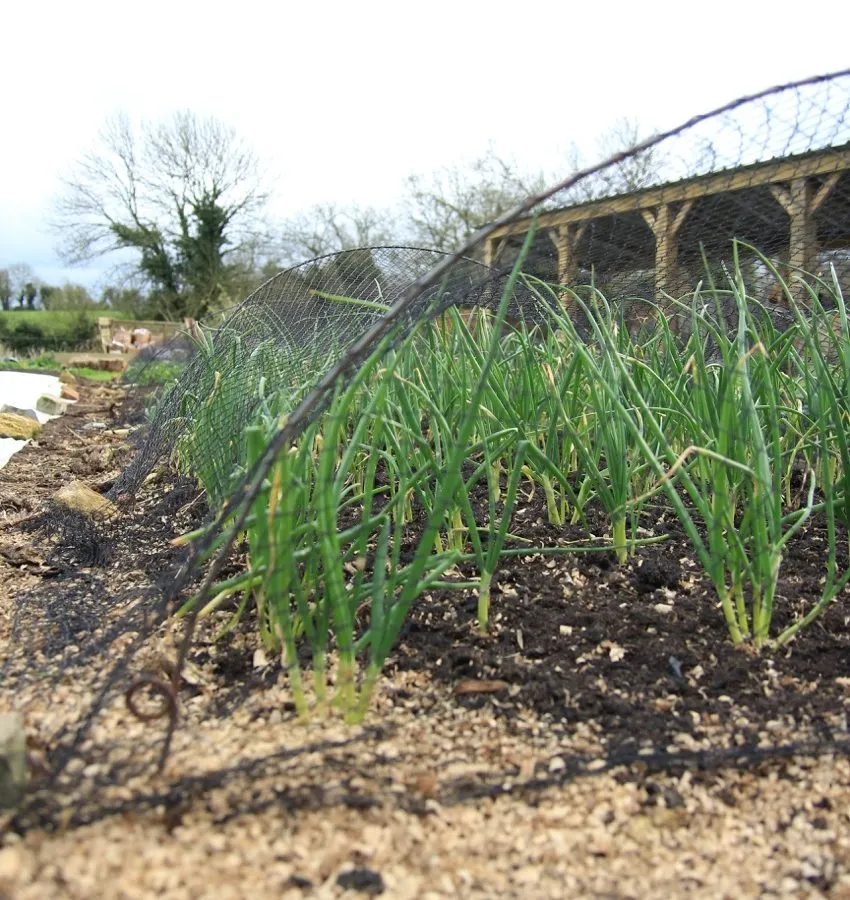
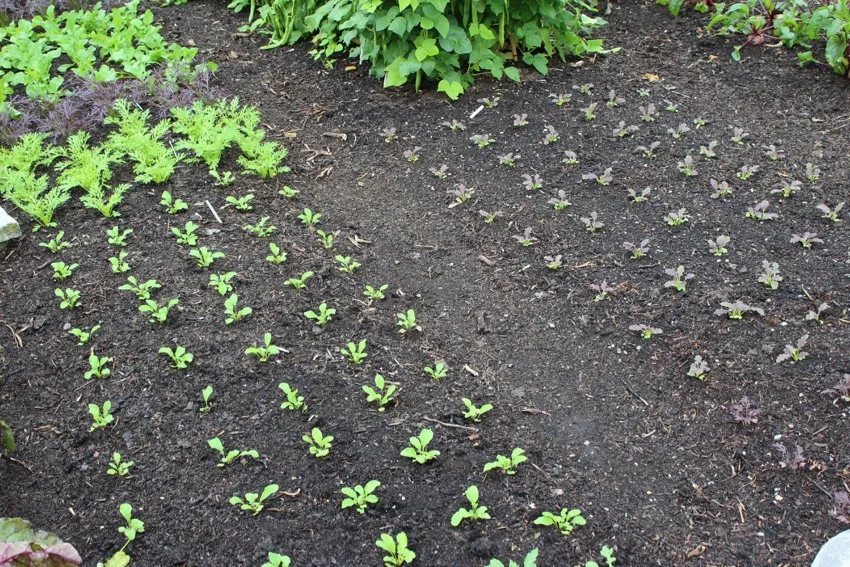
You can really see the difference between the next two photos, and the second one is my objective every time: sloping sides and weed free paths. In this case, I used 3 cm (1 in) of green waste compost as path mulch.
Summarising paths
- Have paths as narrow as you are comfortable with, and keep them weed free – easy when you have been thorough with mulching in year one.
- Look on your paths as living soil, not soil that is compact and dead. Walking on them does not damage structure when the surface is alive with food for organisms, which keep soil open as they move around and breed.
- Well maintained paths hold food and moisture for plants, whose roots into the paths benefit the structure, as well as increasing overall growth. This is a big reason for not having sides to beds, and for keeping paths clean and fed.
- Be friends with a local tree surgeon/arborist or garden contractor: they often have woody wastes they need to be rid of. Sometimes they would even have to pay for ‘landfill’, and will love you for accepting their ‘waste’ shreddings.
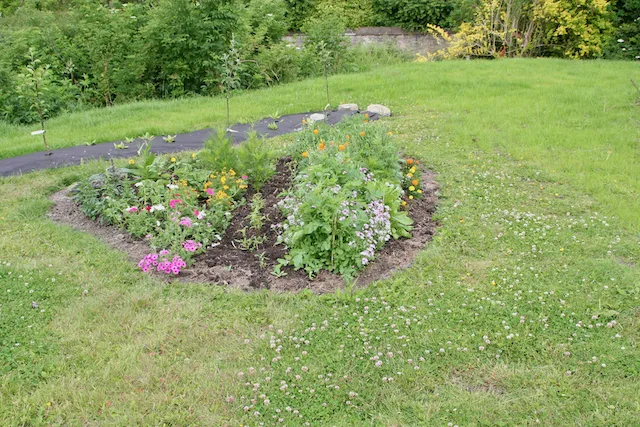
Edges to a whole plot
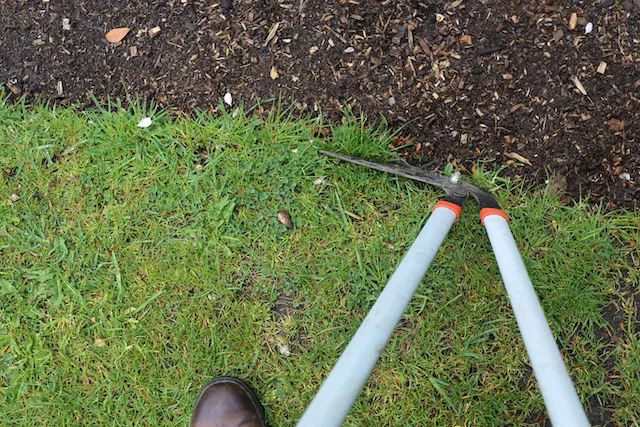
While we’re talking about paths, it makes sense to consider the boundaries. Always keep an eye on these, because this is where weeds invade from. The easiest maintenance is with weed free paths, to provide a clear boundary zone to the wildness beyond your growing space. The edge to the wilder boundary needs to be kept short and tidy, because otherwise grass and weeds encroach into beds.
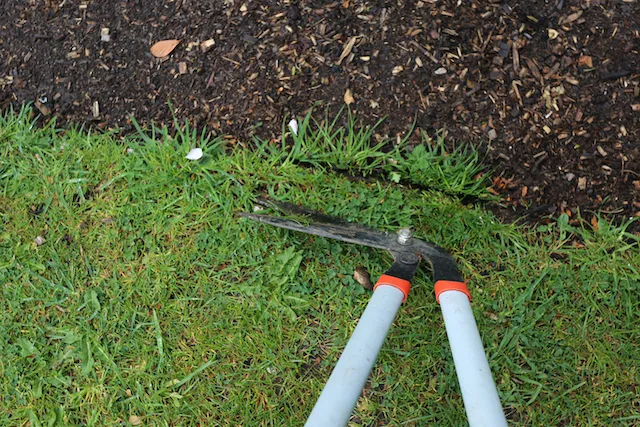
Lay cardboard along boundary edges if weeds are vigorously spreading into the outer path. Some cutting with long handled shears is also necessary, because grass and weeds are always spreading horizontally, as well as growing upwards. This weakens their root systems, making them:
- Less able to spread in.
- Less likely to be giving shelter to pests.
- Less able to draw moisture and nutrients from the growing area.

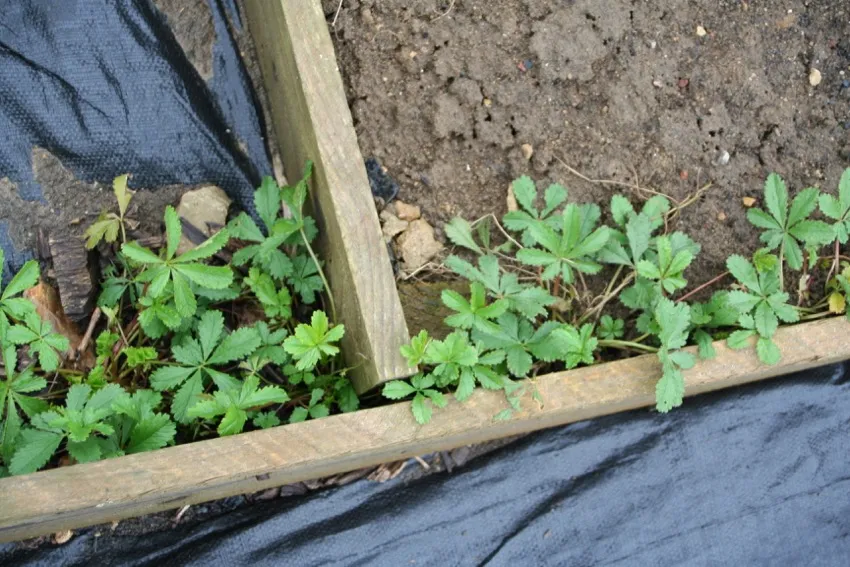
*Creeping tormentil is a troublesome weed if you have it, always invading. Latin name is Potentilla, other colloquial names of related plants are cinquefoil and silverweed.
I maintain cardboard along edges for at least six months of year one. Thereafter I cut the edge line of grass and weeds with long handled shears.
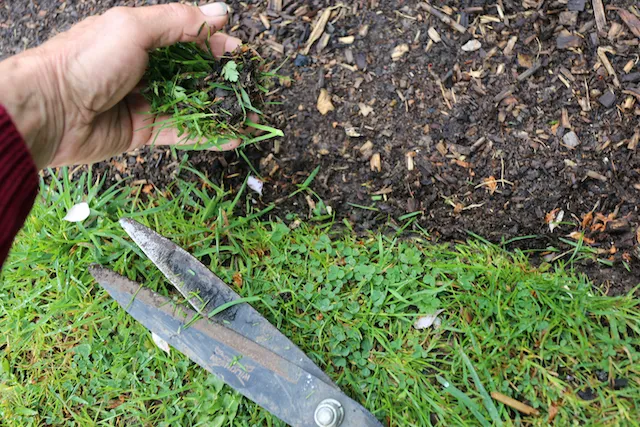
We always mow grass and weeds around the edge of growing areas. The mown strip in larger gardens may be 2–3 m (up to 10 ft) wide, depending on how much space is available. Beyond it is wildness, where you want it: away from beds and paths.
Further reading
- Fungi in the soil: Elaine Ingham and her Soil Food Web
